Setting Up Your Development Environment
a. Install Android Studio: Download link
Download the latest version of Android Studio suitable to your Operating System (Windows, Mac & Linux)
b. Walkthrough the installation and setup.
Complete the installation & Open the Studio
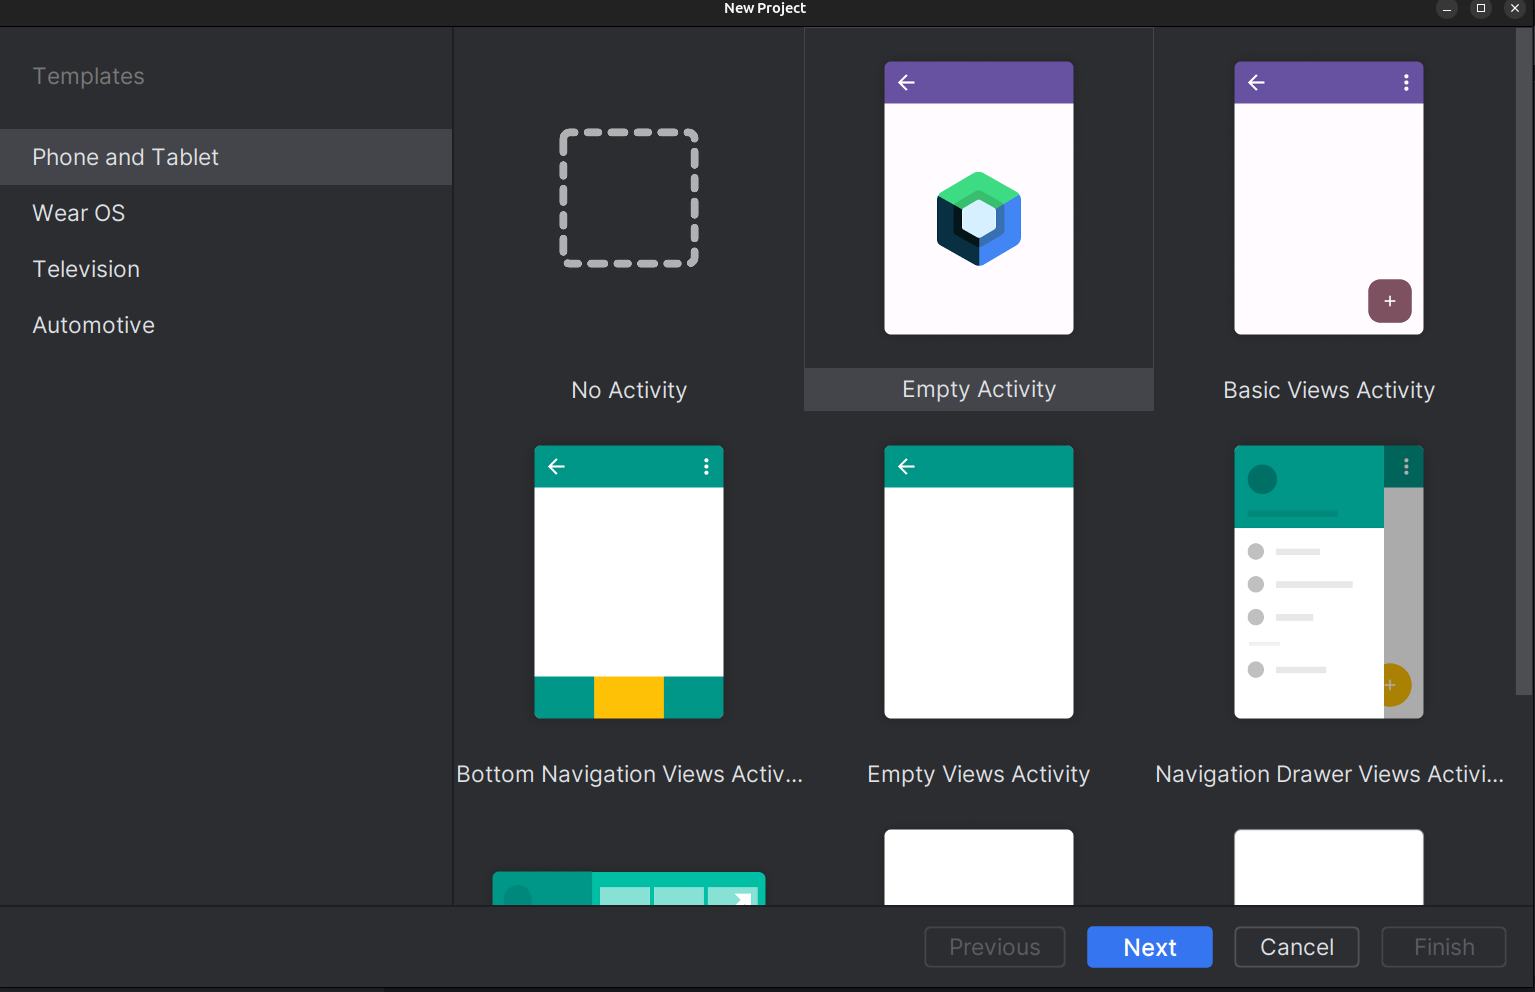
Select New Project > Choose Phone > Empty Activity (or any other one you wish you to explore)
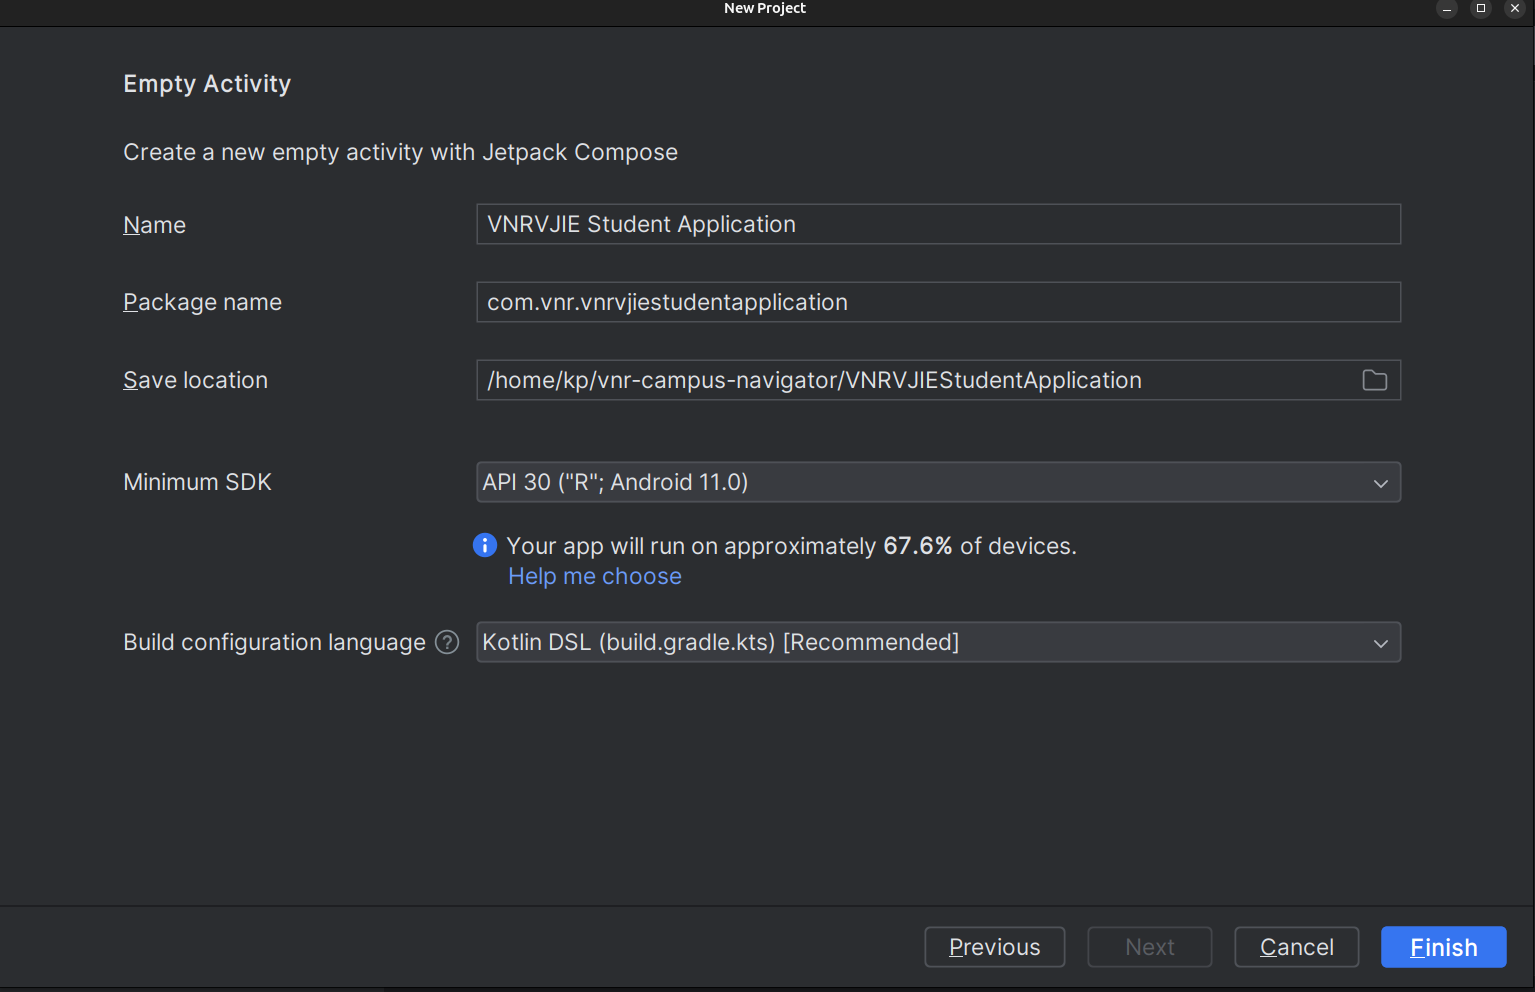
Give name for your application, always give a prefix com.vnr to your package. (even better in.ac.vnrvjiet)
Shoose minimum SDK Android 11 or above. Your app will not run on older devices like 8, 9 & 10 etc
Even though you dont know Kotlin, still select that. You will learn it easily.
It may take a while to download all the dependent libraries. Give it some time.
c. Understand the Code:
Take sometime to understand the folder structure & important files.
- res > layout files : These show the UI layouts for each screen.
- MainActivity file: Shows what Activity to run when application starts.
- Other important : Gradle (helps to compile & manage libraries) , Manifest (important configurations)
Try to understand what is happening in MainActivity (it is just like your main method in C program)
d. From the tool bar select an virtual device and hit the play button
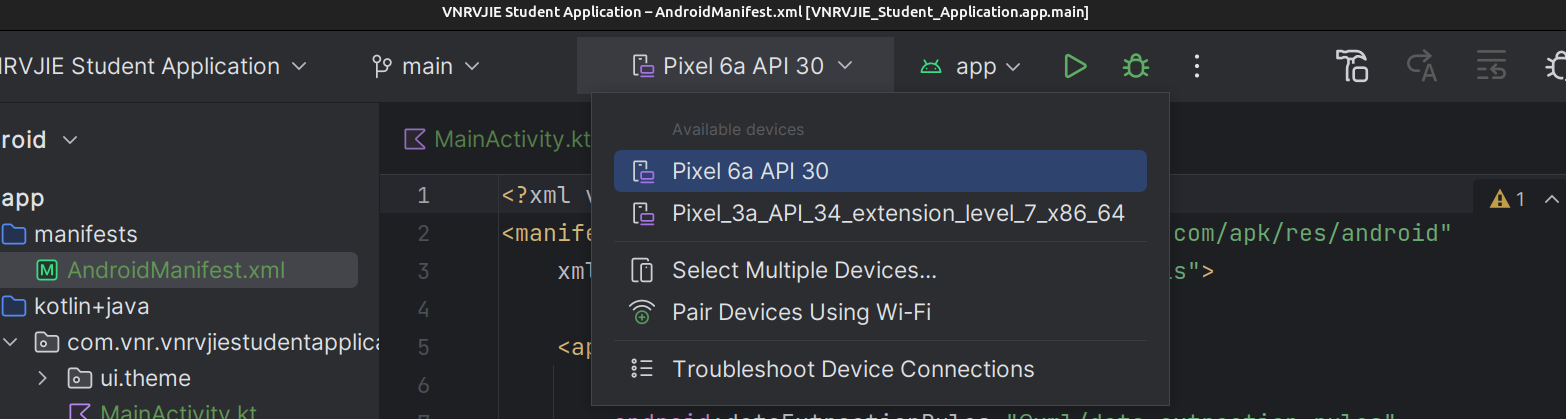
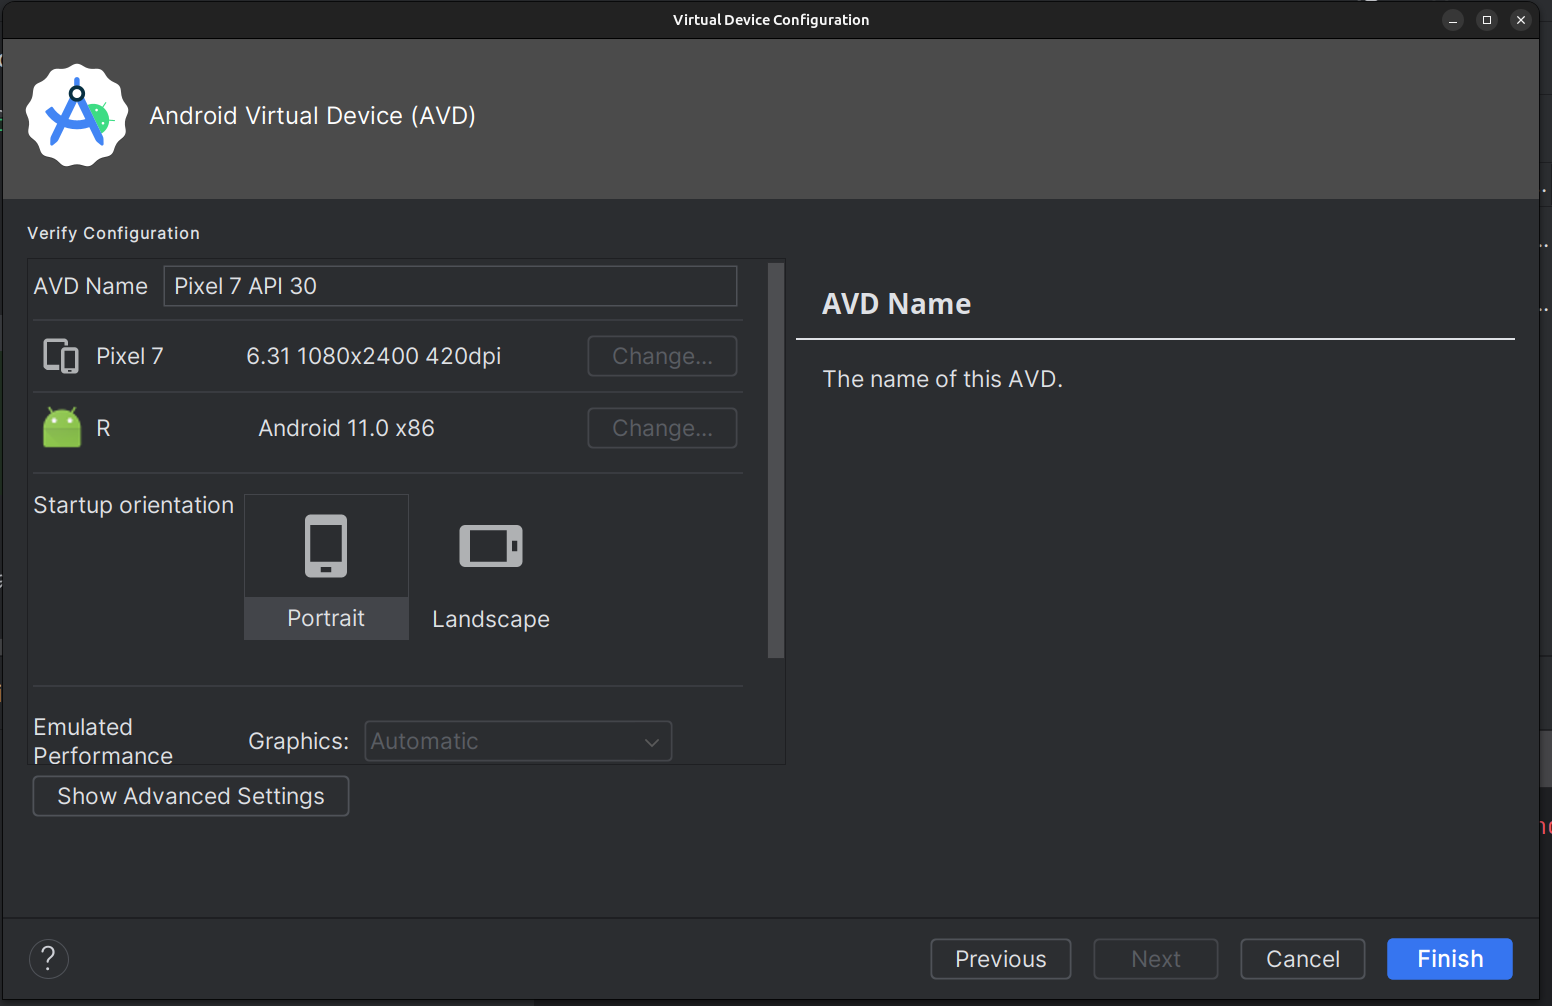
To Create Virtual device of your choice go to Menu > Tools > Device Manager.
Note: in my code i have to change
compileSdk = 35 (from 34 in build.gradle (Module : app)
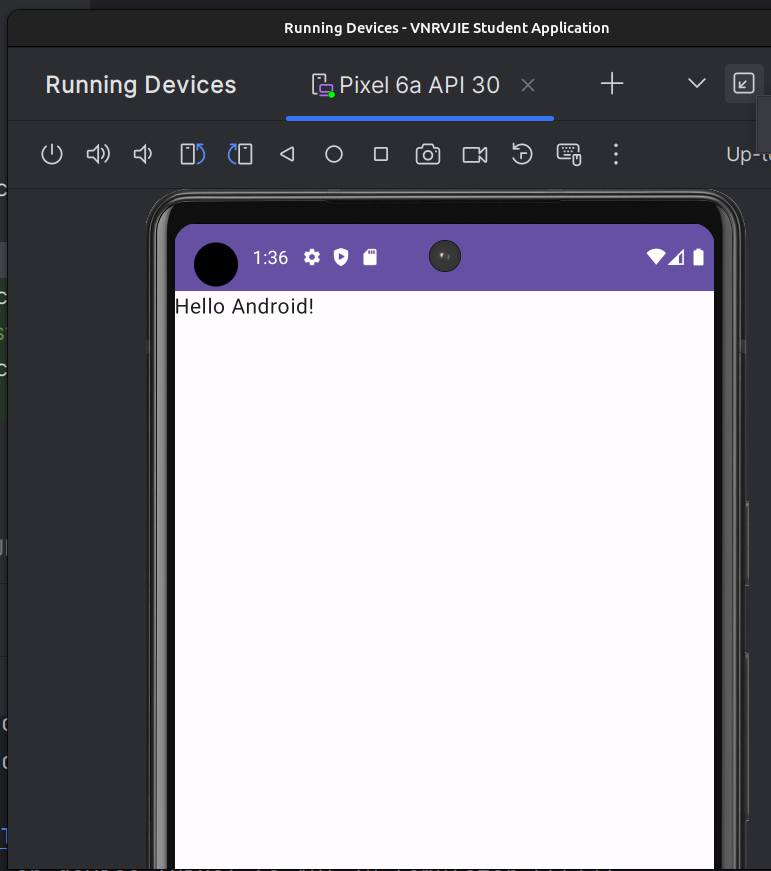
You will see output like this.
Feel free to play with MainActivity file and hit Shift + F10 to refresh the app on your Virtual Device
On the virtual device emulator, you can click the Refresh button for faster response.